If you’ve noticed that your brake rotors, or discs, have become orange or reddish in color due to rust, you may be wondering how to remove this rust and restore the rotors to their normal appearance.
Various factors, including exposure to water and salt, poor maintenance, and the accumulation of brake dust, can cause rust on brake rotors.
Removing rust from brake rotors can be a bit of a challenge, but there are a few steps you can take to effectively remove the rust and prevent it from returning.
In this article, we will discuss some tips and techniques for removing orange rust from brake rotors, as well as some steps you can take to prevent rust from forming on your rotors in the future.
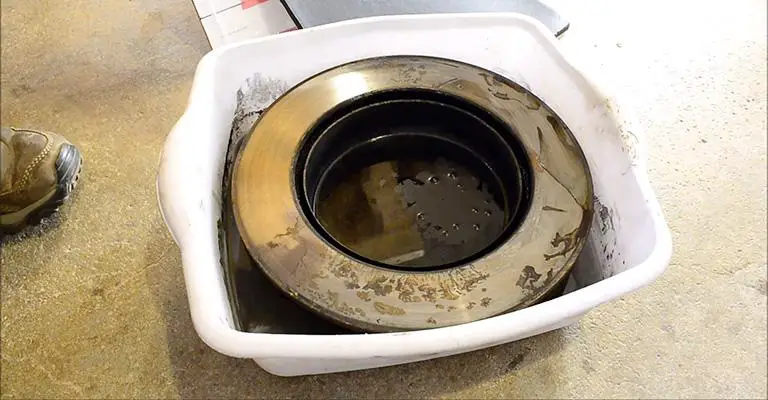
Contents
- 1 How To Remove Orange Rust From Brake Rotors?
- 2 Final Words
Why Do Brake Rotors Get Rusty?
Understanding how the brake rotors get rusty can be helpful before cleaning them. Steel has traditionally been the material of choice for brake system components because of its strength, durability, and heat resistance.
Many elements of brake pads are made from steel, including brake rotors. Corrosion is the most common weakness of steel, despite its strength. Whenever steel is exposed to moisture, it rusts.
It is even faster for steel to rust when exposed to excessive moisture, especially when it is combined with road salt. Vehicles can lose their appearance and integrity slowly as a result of rust.
There is a danger that rust could threaten the safety and longevity of components in a braking system. Some types of rust on the braking system are normal, so it’s not always an alarming sign.
A steel brake rotor can become rusted after being left overnight in a rainstorm or heavy snowfall. The rust layer on a steel rotor only appears on the surface and disappears after a few minutes of driving.
When the brakes are engaged, the brake pads remove light surface rust from the brake rotors’ surfaces.
How To Remove Orange Rust From Brake Rotors?
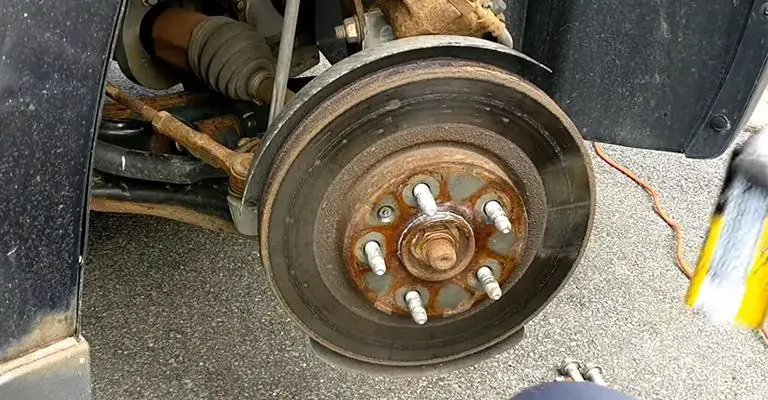
Before I begin, I want you to keep this information in mind. A rusty surface is a sign of damage, while corrosion reveals damage more serious beneath the surface. It will be necessary to resurface or replace the rotors if there is corrosion present.
It is important to remember never to apply lubricant (such as WD-40) or permanent coatings to the braking surface of a rotor. The following steps will show you how to remove rust from brake rotors.
Materials Required
- Commercial cleaner or distilled white vinegar
- Brake cleaner spray
- Non-oily rags
- Steel wool
Tools Required
- Floor jack
- 6-inch C-clamp
- Large bucket or basin
- Combination wrench set (standard for domestics/ metric for imports)
- A lug wrench or impact wrench and socket
- Length of pipe for handle extension (optional)
- Wheel chocks
- Tray to catch runoff
- Wire-bristled brush
Step 1: Drive the Car

During a period of time in which the vehicle sits for a few days, some rust will develop on the rotors. It is possible to remove this superficial rust simply by driving.
Check the brake rotors after a short spin that includes some stop-and-go driving. When corrosion is still visible, proceed to the next step. You need to find a deserted street or an empty parking lot.
Initially, get the vehicle moving at a speed of 10 mph, then brake hard. Once you have completed this process, repeat it several times and check the rotors. Continue with the next step if there is still rust.
Step 2: Rotor Cleaning Prep
Always place chocks behind the wheels if you aren’t working on an axle. Using a floor jack, lift the wheel off the ground after loosening the lug nuts.
A jack stand is highly recommended as a secondary safety measure in addition to a floor jack. Using a wheel removal tool, expose the rotor.
Step 3: Remove the Caliper and Pads, if Necessary
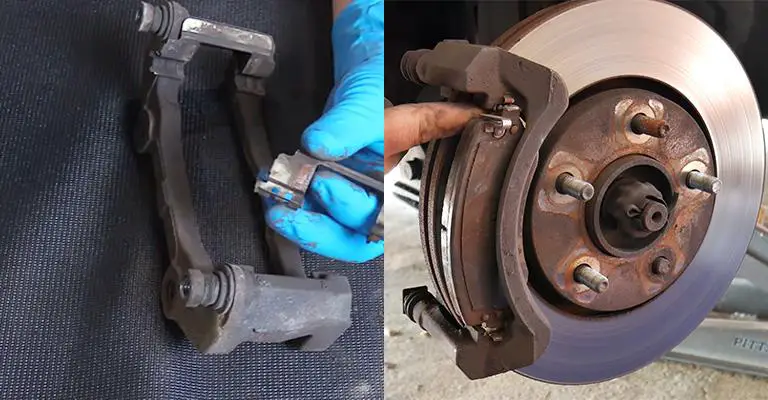
When you remove the pads and caliper from the rotor, you might be able to clean it more easily. Using a box-end wrench, you will need to remove the bolts that hold the caliper assembly to the bracket guide pins.
Secure the caliper assembly in the wheel well so it can hang freely without damaging the brake lines. Remove the caliper assembly from the rotor and lift it off the rotor.
Most auto stores also offer caliper hangers, which work similarly to old wire clothes hangers. To remove the caliper bracket (which holds the pads), loosen and remove the bolts with a box-ended wrench. Put this aside and remove it.
Step 4: Inspect the Pads
You should check for glazing on the pads while the brakes are apart (a crystalline appearance). Additionally, you should measure the brake pads’ thickness.
You should replace anything that is less than 4 mm deep. Inspecting the caliper’s guide pin boots and piston boots is also important.
Whenever these boots lose their integrity, dirt and corrosion can accumulate inside them, causing them to seize. It is imperative to address this issue as soon as possible.
Step 5: Use Brake Cleaner to Remove Rust From the Rotors
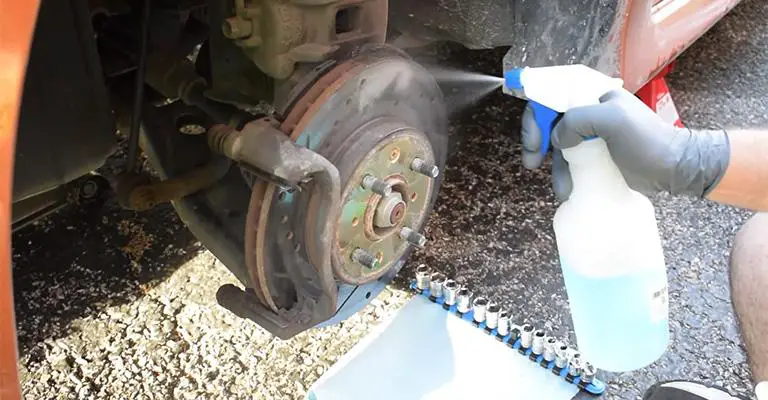
Afterward, clean the rotor with brake cleaner by spraying it on a tray. When the rotor is completely dry, wipe it with a clean rag containing no oil.
If any rust remains, apply more brake cleaner and use steel wool or a wire brush to remove it. After wiping off the rotor, spray it with cleaner a final time. Ensure that the area in which you are working is well-ventilated.
Note:
Although the caliper assembly may remain in place, you must turn the rotor to access the pads. You shouldn’t overapply brake cleaner, as the excessive application may dissolve the adhesive between the lining and the backing of the pads.
Step 6: Alternative Cleaning Solution
You could also try commercial cleaners, such as Evapo-Rust or CLR if your brake cleaner doesn’t work. Unlike other rust removers, these products do not damage the metal beneath the rust.
While vinegar is an eco-friendly alternative to commercial cleaning products, it may not perform as well. Scrub the rotor occasionally with steel wool or a wire brush but be careful not to score the surface. Dry with a cloth after rinsing.
Work backward to reassemble the brakes and mount the wheels as soon as the rotors are clean. A large C-clamp may be needed to retract the piston in the caliper assembly so it can cover the brake pads.
In addition, once the vehicle is down from the jacks, it should only be torqued after the lug nuts are tightened.
Simply Driving Your Vehicle Can Clean Some Rust And Dust
If you leave your vehicle parked for a few days, your rotors will likely develop some rust. Drive your car, and you’ll remove this superficial rust. After some stop-and-go driving, check the rotors on the vehicle.
Final Words
Rust and dust on brakes are unsightly and may cause corrosion on your wheels. Since brakes function by friction and brake pad wear, some dust is inevitable. Because of their design, brakes will always expose your wheels to dust.
Your braking system can require time and money to maintain, but it is ultimately worth the effort. In most cases, drivers brake when they need to. A good braking system ensures good braking performance.
Furthermore, bad brakes seriously threaten your safety and the safety of the people you share the road with. The rotors on your brakes should be cleaned regularly to maintain excellent brake performance.
